Step-by-Step: How to Create the Perfect DIY Chicken Brooder
Without a proper chick brooder, chicks can be exposed to dangers like fluctuating temperatures, overcrowding, and potential predators. Navigating the world of chicken brooding can be overwhelming, with endless choices and advice available.
Finding a simple, cost-effective solution that ensures the safety and health of your chicks can seem like a daunting task.
To address this, let’s delve into a step-by-step guide on creating the perfect DIY chicken brooder and ensuring your chicks have the best possible start.
What is a Chick Brooder and When Do Chicks Need It?
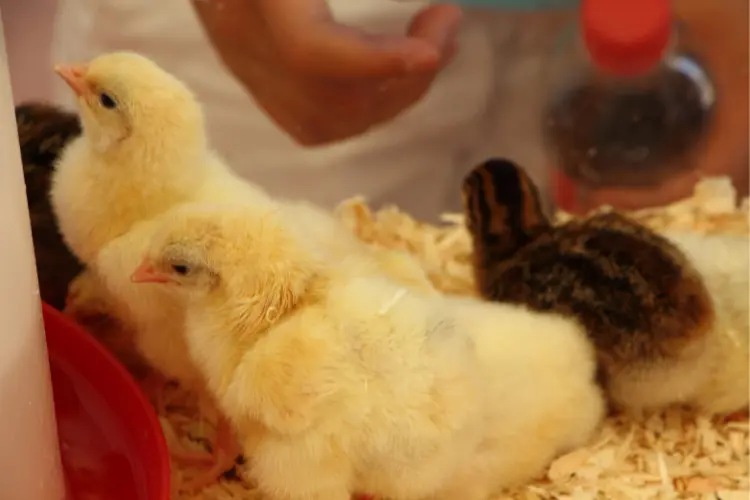
A chick brooder is a controlled, warm enclosure made to provide a safe and nurturing environment for newly hatched or young chicks. Chicks need a brooder as soon as they hatch or are introduced into your care, typically within hours of hatching.
This is because chicks are unable to regulate their body temperature effectively and require a consistent source of warmth, usually around 95-100 degrees Fahrenheit (35-37 degrees Celsius) during their first week of life.
The brooder also ensures access to food, water, protection from predators, and a clean environment, all of which are crucial for the chicks’ health and survival.
It’s essential to have the brooder ready and warmed before the chicks arrive to ensure their well-being and a smooth transition into their early stages of development.
What Are the Needed Supplies in a Chicken Brooder?
- Heat source (heat lamp or heating pad)
- Thermometer
- Brooder box or enclosure
- Bedding material (wood shavings, straw, or paper towels)
- Feeder and chick feed
- Waterer and clean water
- Proper lighting (for day-night cycle)
- Ventilation
- Protection from drafts and predators
- Non-slip surface for chicks’ footing (optional)
- Brooder guard (to prevent chicks from crowding around heat source)
- Cleaning supplies (for maintaining a clean environment)
Read also: 10 Must-Have Baby Chick Raising Supplies: A Complete List
How to Create a DIY Chicken Brooder
Step 1: Choose a Suitable Container
The container you choose for your brooder is the foundation of the entire setup. Your container should be spacious enough to accommodate the growing chicks and prevent overcrowding.
Initially, chicks don’t require much space, but as they grow, they’ll need more room to move around. Large plastic storage bins, kiddie pools, or even a wooden box can serve as suitable containers. Ensure the container has high sides to prevent the chicks from jumping out.
Additionally, the container should be easy to clean, as maintaining hygiene is vital for the health of the chicks. If you’re using a container with a lid, make sure it has ventilation by drilling small holes or cutting out sections and covering them with a wire mesh.
Step 2: Add Bedding to the Chosen Container
Bedding is essential to absorb moisture, control odor, and provide a comfortable surface for the chicks. Pine shavings are a popular choice for brooder bedding due to their excellent absorbency and relatively low cost.
Spread a 2-3 inch layer of shavings at the bottom of your container. It’s crucial to avoid using cedar shavings, because they contain oils that can be harmful to chicks.
Regularly check the bedding for dampness, and replace or add more shavings as necessary to keep the environment dry and clean.

Step 3: Set Up the Heat Source
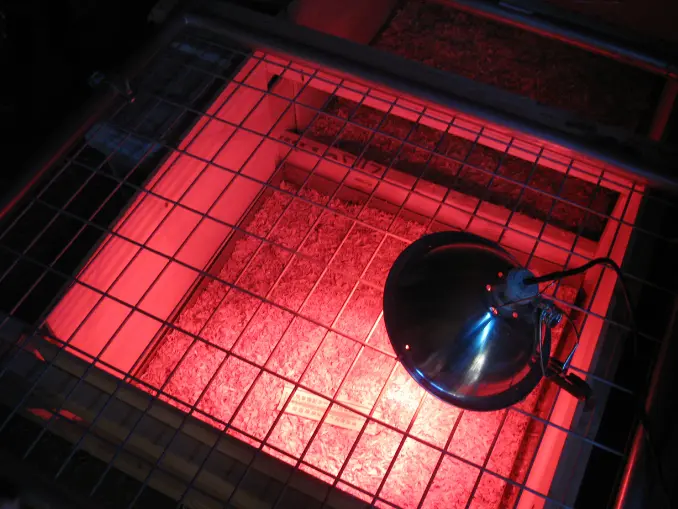
Chicks require a consistent heat source to thrive, as they cannot regulate their body temperature well during their early weeks. There are various options for brooder heat sources, with heat lamps being the most common.
When using a heat lamp, secure it firmly above the brooder, ensuring it doesn’t pose a fire hazard. Red bulbs are preferred over white, as they tend to reduce chick aggression.
As a substitute for heat lamps, you can also use radiant heat plates, which mimic the warmth of a mother hen and are safer than lamps. Whichever heat source you choose, ensure it’s adjustable, as you’ll need to decrease the temperature gradually as the chicks grow.
Read also: How Long Do Chicks Need a Heat Lamp: The Definite Answer
Step 4: Always Monitor the Brooder Temperature
Maintaining the right temperature is paramount for the health and well-being of the chicks. During their first week, the brooder’s temperature should be around 95°F (35°C). With each passing week, reduce the temperature by about 5°F until it reaches ambient room temperature or the chicks have fully feathered.
To monitor the temperature, place a thermometer at the chick’s level in the brooder. Observing the chicks’ behavior can also provide insights into their comfort level.
If they’re huddled directly under the heat source, they’re likely cold. If they’re spread out and avoiding the heat source, they might be too warm. Adjust the heat source accordingly to ensure their comfort.
Step 5: Provide Food and Water
Nutrition is crucial for the growth and development of chicks. Start by providing a specially formulated chick starter feed. This feed contains the right balance of nutrients the chicks need for their first weeks of life. Use shallow feeders to prevent chicks from sitting in their food or scratching it out. Clean and refill the feeders daily.
Water is equally important. Use chick waterers, which are designed to prevent drowning. Refill the waterers daily and ensure they’re always clean, as chicks can dirty their water quite quickly. As the chicks grow, you might need to upgrade to larger feeders and waterers to accommodate their increased intake.
Read also: Best Chicken Water Cups 2023: Ultimate Buyer’s Guide

Step 6: Lighting
While the heat source will provide some light, chicks benefit from a natural light cycle. A consistent light schedule helps regulate their feeding habits and overall health.
If possible, I suggest placing the brooder in a location with natural light but avoiding direct sunlight, which can overheat the brooder. If using artificial lighting, mimic a natural light cycle by providing approximately 14-16 hours of light followed by 8-10 hours of darkness.
Step 7: Ventilation
Proper ventilation ensures fresh air flow, which is vital for the health of the chicks. A build-up of ammonia from droppings can be harmful, so adequate ventilation helps dissipate this and other harmful gases.
If your brooder container has a lid, drill holes or cut out sections, covering these openings with a fine wire mesh to keep out predators and prevent chicks from escaping. Ensure that the ventilation doesn’t create drafts, as this can chill the chicks.
Step 8: Optional Brooder Guard
A brooder guard is a barrier placed around the heat source. This serves multiple purposes: it prevents chicks from wandering too far from the heat, offers protection against drafts, and creates a designated warm area.
Typically, a circular cardboard barrier about 12-18 inches high is sufficient. Place it around the heat source, ensuring there’s enough space for the chicks to move in and out of the warm area as they please.
Step 9: Monitor and Adjust
Raising chicks is a dynamic process, and their needs change as they grow. Regularly observe their behavior. If they seem restless, check their food, water, and temperature. If they appear lethargic or unwell, they might be too cold or have a ventilation issue.
As they grow, increase the size of the feeders and waterers and adjust the height of the heat source. Stay vigilant for signs of sickness, and separate any ill chicks from the healthy ones to prevent potential spread.
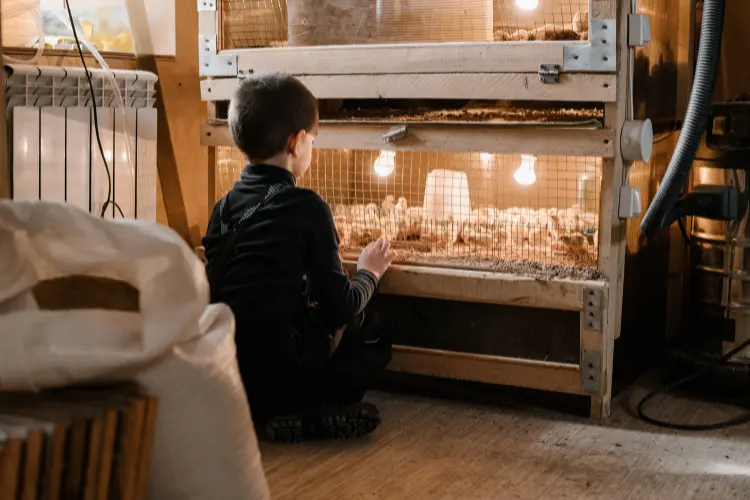
Where’s the Best Spot for Your Chicken Brooder Box?
The best spot for your chicken brooder box is an indoor location that offers consistent warmth and is safe from potential hazards. Ideally, choose a place like a barn, garage, workshop, basement, or dedicated space within your home, ensuring it maintains a temperature above 50º F (10º C).
This indoor setting not only protects from temperature fluctuations and external threats like predators but also allows easy access for regular monitoring and care.
Additionally, if located within a household, ensure that pets and young children can’t disturb the chicks. Consider placing a sturdy cover on the brooder for added safety and heat retention.
Read also: A Comprehensive Guide to Raising Baby Chicks Week by Week
How to Clean Your Chick Brooder Box
- Remove Heat Source: Begin by disconnecting and removing any heat lamps or heating plates from the brooder.
- Remove Chicks: Carefully transfer the chicks to a safe and contained area, ensuring they remain warm during this process.
- Remove Feeder and Waterer: Take out the food and water containers to clean them separately.
- Remove Dirty Bedding: Empty the brooder of all old and soiled bedding, disposing of it properly.
- Wash the Brooder: Using a mild soap and water mixture, spray and scrub the inside of the brooder to ensure all droppings and residues are removed.
- Dry Thoroughly: It’s essential to ensure the brooder is completely dry before reintroducing bedding and chicks. This can prevent mold growth and ensure a comfortable environment for the chicks.
- Replace Bedding, Food, and Water: Lay fresh bedding in the brooder. Refill the cleaned food and water containers and place them back inside.
- Return the Chicks: Once everything is set, gently place the chicks back into their cleaned home.
- Reconnect the Heat Source: Reintroduce the heat source, ensuring it’s at the correct height and temperature for the age and comfort of the chicks.
What’s the Right Size for a Brooder Box?
Raising chicks is an exciting journey, but providing them with the right environment is crucial for their healthy growth. One of the first decisions you’ll face is the size of the brooder, which will house your chicks during their early weeks of life.
For Younger Chicks (Under 4 Weeks Old):
Chicks are small and delicate during their initial weeks, and their primary needs are warmth, food, and safety. For this age group, a container that stands 12 inches tall is generally sufficient to prevent them from hopping out.
Regarding floor space, I recommend allocating at least 6 square inches per chick. This ensures they have enough room to move around, feed, and rest without overcrowding. Overcrowding can lead to issues like stress, disease spread, and even cannibalism among the chicks.
For Older Chicks:
As chicks grow, they not only increase in size but also become more active and require more space. For chicks that are older than four weeks, a 24-inch-tall enclosure becomes essential to contain their increased jumping capability.
Additionally, these older chicks should be given a minimum of one square foot of space per chick. This larger space accommodates their size and activity level, ensuring they remain healthy and stress-free.
Frequently Asked Questions
How Much Time Should Chicks Spend in Brooder Boxes?
Chicks typically must stay in a brooder box for at least six weeks. However, the exact duration can differ based on the breed and the rate of feather development.
Most chicks are ready to transition to an adult enclosure once they have developed most of their juvenile feathers, signifying their ability to regulate body temperature effectively.
What Is a Safe Number of Chicks to House in a Brooder?
The number of chicks that can be safely housed in a brooder depends on factors like the brooder’s size and the age and size of the chicks.
Initially, you can comfortably house ten to fifteen chicks in a standard-sized brooder. However, ensure that each chick has a minimum of six square inches of space to avoid overcrowding.
Take Care of Your Chicks with Chicken Raising 101
Making a DIY chicken brooder is like building a comfy little playpen for baby chicks. By following our simple step-by-step guide, anyone can create a safe and warm spot for these little birds.
It’s all about giving them a good start in life. And the best part? Doing it yourself means you know it’s made with care and love. So, with a bit of effort, your chicks get a great home, and you get the joy of building it for them. Happy chick-raising!
Want more insights and helpful tips? Dive deeper and explore all things about chicken raising on our website. Don’t miss out on expert advice and guidance – read more on our website now!