How to Build a Chicken Coop: A Step-by-Step Guide

Building your own chicken coop can be a rewarding and sustainable way to provide fresh eggs and a happy home for your feathered friends.
With my step-by-step guide on how to build a chicken coop, you’ll be able to create the perfect backyard haven for your chickens. So, let’s embark on this exciting journey together and turn your DIY chicken coop dreams into reality.
Step 1: Choose the Right Location
A well-planned chicken coop location is crucial for the health and safety of your flock. The perfect spot should combine the right amount of sunlight, shade, and elevation to keep your birds dry and comfortable. I recommend placing the chicken coop relatively close to your home or in a highly trafficked yard area for maximum convenience and visibility.
Consider raising wooden chicken coops off the ground to provide shade and keep water out during rainy weather, ensuring your flock’s feet stay dry.
Choosing the right location will not only make your chickens happier, but also provide easy access to their nesting boxes and coop door, simplifying your routine tasks.
Step 2: Plan Your Coop Design Essentials
In this step-by-step guide, we’ll cover essential elements of a well-designed chicken coop, including size, ventilation, insulation, and predator protection measures.
Adhering to these guidelines for raising chickens will allow you to create a comfortable and secure home for your chickens, promoting their well-being and optimal egg production as they lay eggs.
Size and Space Requirements
The size and space requirements of your chicken coop are crucial for the comfort of your chickens. To ensure your chickens are happy they have enough room to move freely, provide at least 4 square feet per chicken in the coop design.
The ideal dimensions for chicken coops are 8-10 square feet per chicken, which will help promote their optimal comfort and health.
For the outdoor run, aim for 10-20 square feet per chicken, providing your backyard chickens with ample space to roam, peck, and scratch. Ensuring your chickens require adequate space in your chicken coop and outdoor run sets the stage for a happy and healthy life for your feathered friends.
Ventilation and Insulation
Proper ventilation and insulation are vital to the well-being of your chickens. The screened-in gap between the walls and the slanted roof of the coop allows hot air to escape efficiently, keeping the sleeping quarters below comfortable and cozy for your feathered friends. I recommend adding a wooden floor to the chicken coop to provide a safer and drier environment, enhancing their comfort and health.
When planning to build a chicken coop, be sure to consider ventilation and insulation requirements during your chicken coop build. Keeping a good chicken coop design in mind will help protect your chickens from diseases and maintain a healthy environment for them to thrive.
Predator Protection Measures
Protecting your chickens from predators is an essential aspect of coop design. When building a DIY chicken coop, consider incorporating double barn doors, secure locks, and sturdy materials to keep predators out. Raccoons, for example, pose a significant threat to backyard chickens.
To further safeguard your flock, here are some tips:
- Use strong metal latches that a paw won’t easily open
- Always keep your chickens safely locked up at night
- Elevate the coop off the ground by 8 to 12 inches to deter predators from breaking in
- Use hardware mesh under the floorboards for added protection
Step 3: Gather Your Materials and Tools
Before you start building your chicken coop, gather all the necessary materials and tools. You’ll need:
- Lumber
- Plywood
- Hardware
- Paint
Many backyard chicken coop plans are available online, including a free chicken coop plan, providing you with a wide range of options to suit your preferences, including a suitable chicken coop floor plan.
Organize the materials and tools in a way that makes them easily accessible and simple to use. This will save you time and effort while building, ensuring a smooth and enjoyable experience as you bring your chicken coop vision to life.
Step 4: Build the Coop Frame
A sturdy frame is the foundation of your chicken coop, so take your time to ensure accurate measurements and angles. Here’s how to build the frame:
- Start by clamping the frames together for a secure fit.
- Cut the vertical and horizontal supports for both front and back frames.
- Attach them using exterior construction screws for a sturdier build.
Use 2×3 lumber for the walls to provide strength and stability. When cutting the beaded plywood panels for the interior walls, use a jigsaw for best results. To maximize savings, cut small individual panels for each framed section out of a single 48-inch sheet.
Following these steps ensures the frame of your chicken coop is strong and reliable, paving the way for a successful finished coop build.
Step 5: Install Walls, Roof, and Flooring
Once the frame is in place, it’s time to install the walls, roof, and flooring. Prevent gaps and ensure proper ventilation by laying the panels flush along all of the frame’s edges. When attaching roof panels, use roofing screws with rubber washers for maximum security.
For the flooring, plain, unfinished plywood is the recommended option. This material is cost-effective, highly resilient, and easy to cut out openings and windows for air circulation. Carefully installing walls, roofs, and flooring generates a comfortable and well-ventilated outdoor space for your chickens.
Step 6: Add Doors and Windows
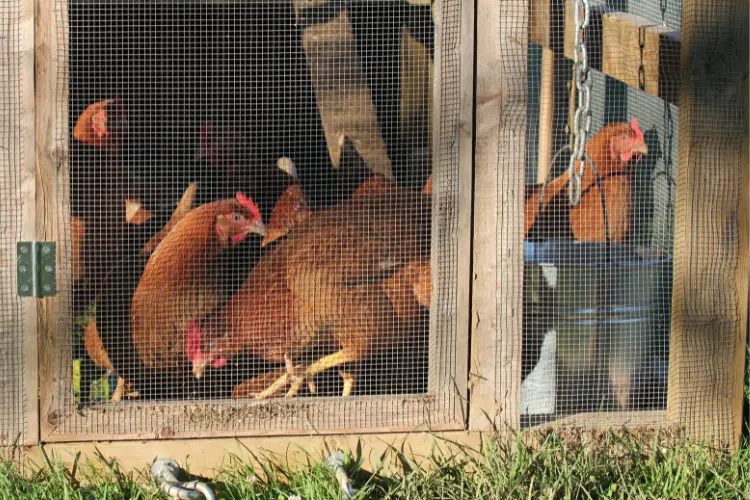
Next, add doors and windows to your chicken coop, ensuring both security and ventilation. Here’s how:
- Construct door frames with sturdy boards.
- Attach the door frames with flat mounting hinges.
- Secure the doors with a side bolt latch.
- Your coop should have a bird entrance and a human entrance for easy access and maintenance.
In warmer months, you can close the hen entrance with hardware mesh for added security and ventilation. Providing secure doors and well-placed windows creates a safe and comfortable environment for your flock.
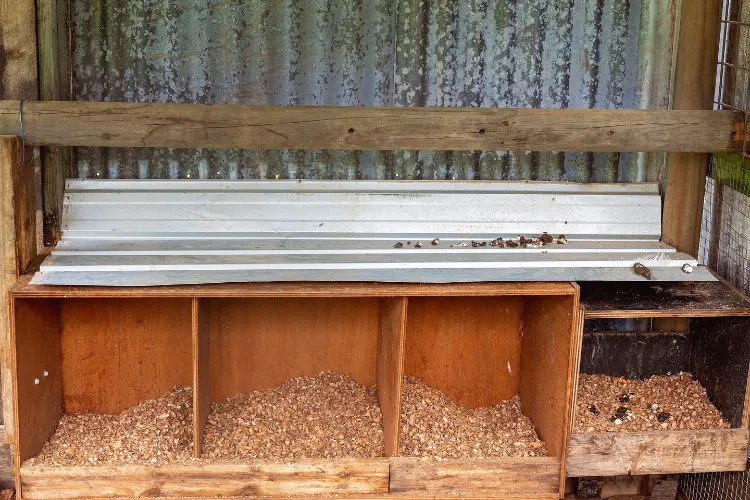
Step 6: Create Nesting Boxes and Roosting Bars
Now it’s time to focus on the interior of your chicken coop, creating cozy nesting boxes and comfortable roosting bars for your chickens. These elements are essential for their well-being and egg production, so it’s important to ensure proper dimensions and placement in building nesting boxes.
When designing the interior of your chicken coop, consider the size of your chickens and the
Nesting Box Dimensions and Placement
For optimal nesting, the nest boxes should be 12” x 12” x 12” or larger. We recommend one nesting box for every three hens or even more for broody breeds. Position the nesting boxes in a tranquil, shadowy coop area for optimum comfort.
Use straw, wood shavings, or shredded paper as bedding materials to make the floor space of the nesting boxes cozy and inviting for your hens. Ensuring proper dimensions and placement of nesting boxes provides your chickens with a comfortable space to lay their eggs.
Roosting Bar Specifications
Roosting bars are essential for your chickens, safe enough to perch on during the night. Provide a minimum of 8 inches of space per chicken on the roosting bars. The optimal height off the ground for roosting bars is at least 2 feet, ensuring maximum comfort for your chickens.
A 2×4 is the perfect size for roosting bars, providing a cozy spot for your chickens to rest. Ensuring proper specifications for roosting bars creates a comfortable and safe environment for your feathered friends.
Read also: What Should Be Inside a Chicken Coop Today – 10 Unseen Items
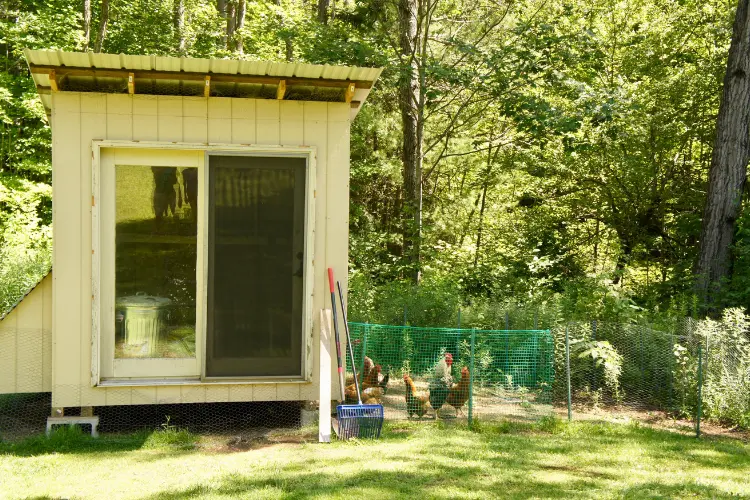
Step 7: Construct an Outdoor Run
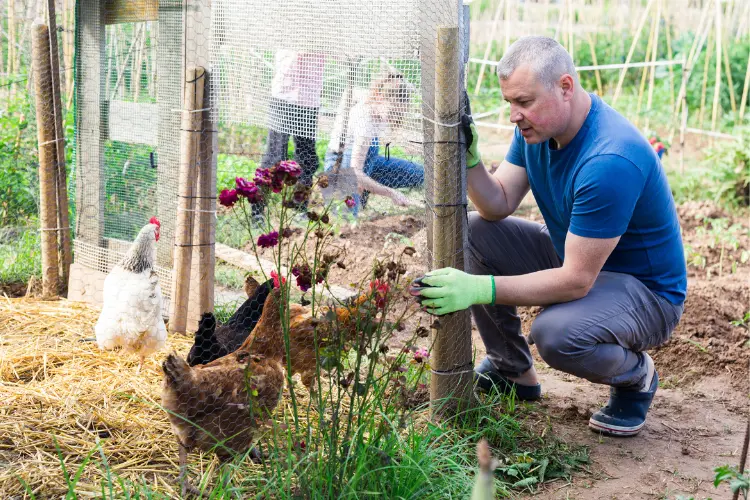
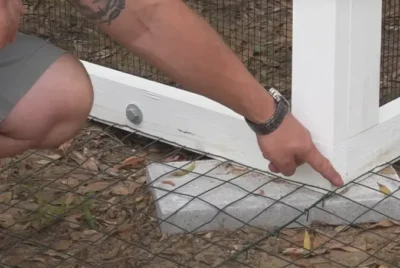
An outdoor run provides your chickens with a secure and spacious free-range environment, as well as protection from predators. To create a safe and secure outdoor run, use chicken wire, hardware mesh and proper fencing techniques. Hardware mesh is the ideal choice for keeping out ground-based predators, as its holes are much smaller than chicken wire’s.
Measure the height of the run side frames accurately, and sink the hardware mesh fencing at least six inches deep to protect against borrowers. Constructing a secure outdoor run offers your chickens a safe and spacious area to thrive.
For more tips and tricks about chicken runs, you can also read our full guide on how to build a safe chicken run.
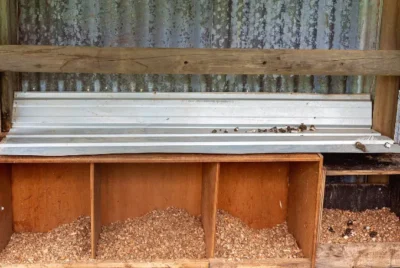
Step 8: Add Accessories and Finishing Touches
To complete your chicken coop, consider adding the following accessories and finishing touches as part of your chicken coop ideas:
- Lighting
- Feeders
- Waterers
- Decorative elements like flower boxes, divided-light windows, and scalloped trim
These additions will not only make your chicken coop more functional but also enhance its aesthetic appeal.
When it comes to protecting the plywood floor and interior walls of your chicken coop, use a rubber roof coating. Remember to let the paint dry before connecting the beaded plywood panels for best results. These final touches create an inviting and efficient space for your chickens.
Step 9: Maintenance and Upkeep
Proper maintenance and cleaning of the chicken coop are key to ensuring the health and well-being of your flock. In colder climates, heat lamps can provide a comfortable environment for your chickens when temperatures in small coop drop below freezing.
Illuminating the inside of the chicken coop is also important to ensure that egg production does not taper off due to shorter days. Regular maintenance and cleaning of the coop promotes the overall well-being of your chickens and ensures a continuous supply of fresh eggs.
Start Building Now
In this step-by-step guide, I’ve covered everything you need to know to build a comfortable, safe, and functional chicken coop for your backyard. Following our advice on location, design essentials, and maintenance, you’ll be well on your way to creating the perfect haven for your feathered friends.
So, roll up your sleeves and let’s get started on this exciting DIY project, bringing the dream of fresh eggs and happy chickens to life.
If you’re aiming for a setup that can comfortably house around ten chickens, then our Best Chicken Coop for 10 Chickens review article is a must-read. It will provide you with in-depth insights and top recommendations tailored for that number of chickens.