Creating the Ideal Chicken Dust Bath to Ensure Their Happiness and Health

Are your chickens refusing to use their dust bath, leaving you concerned about their hygiene and well-being? Creating the ideal dust bath for your feathered friends isn’t always as straightforward as it seems. You might be facing the frustration of ingredients being rejected, the challenge of maintaining a clean and enticing environment, or even the struggle to ensure that your chickens stay healthy and happy.
In this journey to find the perfect dust bath solution, we’ll address these pain points and guide you toward creating a dust bath that ensures your chickens’ happiness and health.
What is a Chicken Dust Bath?
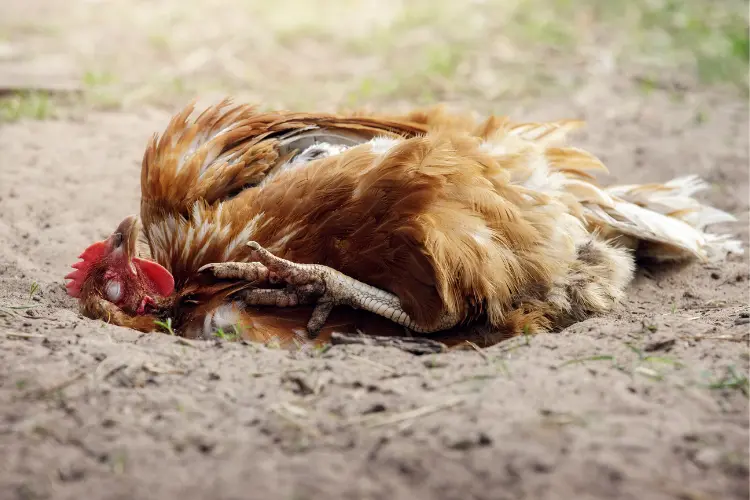
A chicken dust bath is like a spa day for chickens. Instead of water, they use dry, dusty soil. Chickens roll around and flap their wings in this dusty dirt to get clean and healthy. It helps them get rid of extra oils on their feathers and also gets rid of tiny bugs that can bother them. So, it’s like a fun way for chickens to stay clean and happy.
Why Do Chickens Need Dust Baths?
Chickens need dust baths primarily for their hygiene and to maintain healthy feathers. Dust baths help chickens in several ways:
- Cleaning Feathers: Chickens roll and flap in dust or dry soil to cover their bodies. This action allows them to remove dirt, oils, and parasites from their feathers, helping to keep them clean and well-groomed.
- Parasite Control: Dust baths are an effective way for chickens to combat external parasites like mites and lice. The dust particles suffocate and smother these parasites, reducing the risk of infestation.
- Skin Health: Dust baths can help prevent moisture buildup on a chicken’s skin, reducing the likelihood of fungal and bacterial infections. It also helps to maintain their skin’s natural oils.
- Behavioral Enrichment: Dust bathing is a natural behavior for chickens. Providing them with the opportunity to engage in this behavior allows them to express their natural instincts and provides mental stimulation.

How to Create Dust Bath Area for Your Chickens
Materials Needed:
- A suitable container (e.g., a plastic tub, wooden box, old tire, or toddler’s sandpit)
- Dry, well-draining soil or sand
- Wood shavings
- Wood ash and charcoal
- Dry herbs
- Bugs Away (a commercial mix or diatomaceous earth)
- Optional: toys for stimulation
Steps to Make a Dust Bath for Your Chickens:
- Select a Container: Choose a container that is large enough to accommodate several chickens at once, with a diameter of at least 60 cm and a depth of about 20 cm.
- Choose a Location: Find a sheltered spot that protects the dust bath from rain and wind. It’s crucial to keep the dust bath dry and comfortable for your chickens. Possible locations include under a roof, under a tree, inside a shed, or ideally, inside your coop or run.
- Mix Ingredients: In the chosen container, mix the following ingredients to create the dust bath material:
- 40% sand
- 20% soil
- 20% wood shavings
- 10% wood ash and charcoal
- 5% dry herbs
- 5% Bugs Away (or diatomaceous earth for parasite control)
- Place the Dust Bath: Set up the dust bath container in the selected spot and make sure it’s easily accessible to your chickens. You can also add some toys such as balls or bells to make it more fun and stimulating for them.
- Maintenance: Regularly check and replenish the dust bath material as needed. Over time, it may become soiled and compacted, so refreshing it will keep it effective for your chickens.
Best Dust Bath Ingredients
The best dust bath ingredients for chickens include a combination of materials that help maintain their hygiene, control parasites, and provide other health benefits. Here’s a list of the top ingredients for an effective dust bath:
- Sand: Fine-textured sand is a primary ingredient for a dust bath. It helps to penetrate feathers and skin, removing dirt and excess oils.
- Soil: Soil adds organic matter and minerals to the dust bath mix, aiding in adhesion and offering a natural substrate for chickens.
- Wood Ash: Wood ash is rich in nutrients like calcium and magnesium and has anti-parasitic properties. It can help with pest control and provide essential minerals for your chickens.
- Charcoal: Charcoal, like wood ash, offers anti-parasitic and anti-bacterial properties. Ensure it is free of harmful inclusions like nails or chemicals.
- Wood Shavings: Dust-extracted wood shavings, typically from non-treated softwoods, help absorb moisture and maintain a dry environment in the dust bath.
- Dry Herbs: Optional but beneficial. Certain herbs, such as lavender, rosemary, thyme, mint, oregano, and sage, not only add fragrance but also possess anti-inflammatory, anti-fungal, and anti-septic properties. They can repel insects and rodents while benefiting your chickens’ health.
- Diatomaceous Earth (DE): DE is a natural insecticide that kills parasites through desiccation. It’s effective for controlling mites, lice, and other pests.
- Appletons De-Mite Powder: This silica-rich powder has powerful anti-parasitic properties and can be added to dust baths or chicken food.
- Calcium Carbonate: It helps deter insects and pathogens, has a high pH level that controls odors, and can be used in coops and barns.
How to Maintain the Dust Bath Area
Regular Cleaning
Periodically check the dust bath area for any accumulated debris, droppings, feathers, or foreign objects. Use a small rake, shovel, or a handheld litter scoop to remove these materials.
Refresh the Material
Over time, the dust bath material (such as sand, soil, wood ash, and herbs) may become soiled, compacted, or depleted. When you notice signs of this, it’s time to refresh the material.
Moreover, remove the old material and replace it with a fresh mixture of ingredients. Ensure that the dust bath area has an adequate amount of each ingredient to maintain its effectiveness.
Proper Storage
If you store the dust bath ingredients separately from the dust bath area, ensure they are kept in a dry and protected location to prevent moisture contamination.
Maintain Dryness
A dry environment is crucial for an effective dust bath. Ensure that the dust bath area remains protected from rain and moisture. If your dust bath is outdoors, consider providing a roof or shelter.
Prevent Overcrowding
Avoid overcrowding the dust bath area with too many chickens at once. Overcrowding can lead to soil compaction and make the dust bath less effective. Provide enough space for all your chickens to comfortably use the area.
Regular Observation
Keep an eye on your chickens for any signs of mite or lice infestations. If you notice issues, consider increasing the frequency of dust bathing or adding additional pest control measures.
Scheduled Replacements
It’s a good practice to replace the entire contents of the dust bath area at least every six months or more often if needed. This ensures that your chickens always have access to clean and effective dusting material.
The old dust bath material can be disposed of in your compost pile or used as a soil amendment in your garden, as it can enrich the soil and deter pests.
What to Do If Your Chickens Don’t Like Your Dust Bath?
- Check the Ingredients: Ensure that the dust bath mixture contains the right proportions of sand, soil, wood ash, charcoal, herbs, or other ingredients. Chickens may avoid a dust bath with an unappealing or imbalanced mixture.
- Experiment with Ingredients: Chickens have preferences, and what works for one flock may not work for another. Experiment with different ingredients and proportions to see if your chickens prefer a different combination.
- Freshen the Material: If the dust bath material has become soiled, compacted, or damp, it may not be inviting to your chickens. Refresh the material with a clean mixture to make it more appealing.
- Location Matters: Ensure the dust bath area is in a sheltered spot that provides some privacy and protection from the elements. Chickens may be reluctant to use a dust bath that is too exposed or wet.
- Try Different Spots: If your chickens aren’t using the dust bath in its current location, consider moving it to a different spot within the coop or run. Chickens may have preferences for certain areas.
- Add Attractive Items: Place treats or interesting objects near the dust bath to attract your chickens. This can help them associate the area with positive experiences.
- Observe Behavior: Watch your chickens closely to see if any specific factors are discouraging them from using the dust bath. It could be a particular smell, noise, or object nearby.
- Consider Alternative Bathing Spots: Chickens may also choose to dust bathe in loose garden soil, sandy areas, or other locations they find suitable. If they have access to such spots, they may prefer them over your designated dust bath area.
Read also: Expert Tips on How to Bathe a Chicken Stress-Free
By following these steps and creating the ideal dust bath, you provide your chickens with a vital resource for maintaining their happiness and health. A well-maintained dust bath area allows them to engage in their natural behaviors while helping control parasites and keep their feathers clean. Your chickens will thank you with their vibrant plumage and contented clucks.