Step-by-Step on Setting Up Your Chicken Coop Camera
As a backyard chicken keeper, the security and well-being of my feathered friends have always been a top priority. After much research and deliberation, I decided to install a camera in my chicken coop. This decision not only gave me peace of mind but also provided an intriguing insight into the daily lives of my chickens. In this article, I’ll share my experience and offer a step-by-step guide to help you set up your chicken coop camera.
Step 1: Choosing the Right Camera
In the first step, I focused on selecting a camera that met specific requirements crucial for a chicken coop environment. I looked for a chicken coop camera that is weatherproof to withstand outdoor conditions, such as rain, wind, and varying temperatures.
Additionally, I required night vision capability to monitor the coop during the night. I also desired motion detection to alert me to any unusual activity.
After thoroughly comparing various models, I chose a wireless, solar-powered camera equipped with a mobile app. This choice ensured easy monitoring and maintenance, as the solar power kept the camera operating without constant battery changes or wired power sources, and the wireless feature eliminated the need for cumbersome cables.
Read also: Best Cameras for Chicken Coop: Surveillance for Your Flock

Step 2: Finding the Perfect Spot
The second step required me to determine the ideal location for the camera within the coop. Placement was critical, as I aimed to maximize the view of key areas within the coop.
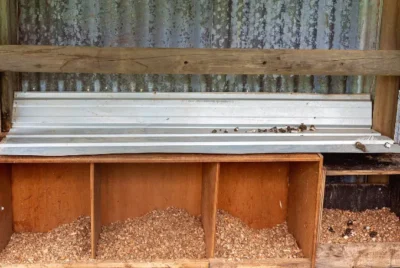
I selected a spot that offered a clear view of the nesting boxes and the main area where the chickens spent most of their time. I also ensure that the camera angle will cover the majority of the coop’s interior without any obstructions.
Additionally, I considered the safety of the camera from the chickens themselves – I needed to place it high enough or in a position where curious chickens couldn’t peck at it or obstruct the lens.
Step 3: Installation
The installation process proved more straightforward than I anticipated. I chose to mount the camera on the wall of the coop using screws. This approach ensured the camera was securely fastened and would not be easily dislodged.
Although some camera models offer alternative mounting options like magnetic mounts or adhesive pads, I preferred the stability and permanence provided by screwing the camera into the wall. This step was crucial to ensure that the camera remained in place and functional, providing a consistent and reliable view of the coop’s interior.

Step 4: Setting Up the Network
In the fourth step, I focused on connecting the wireless camera to my home Wi-Fi network. This required me to carefully follow the manufacturer’s instructions to sync the camera properly with the network.
I checked the Wi-Fi signal strength in the coop area beforehand, as a weak signal could impact the camera’s performance. A strong and stable Wi-Fi connection was essential to transmit live footage and alerts from the camera without any interruptions or connectivity issues.
Step 5: Configuring the Camera Settings
For the fifth step, I tailored the camera’s settings to my specific needs using the provided mobile app. This app was incredibly useful, enabling me to adjust various settings, including the sensitivity of the motion detection feature.
Moreover, this adjustment was crucial, as it determined how the camera responded to movement in the coop. In the days following the installation, I experimented with different settings to find the optimal configuration for my setup. This process allowed me to customize the camera’s functionality for the most effective monitoring of the coop.

Step 6: Regular Maintenance Checks
Regular maintenance became a vital part of the process. To ensure optimal functioning of the camera, I established a routine for checking it for dirt, spider webs, or other elements that might obstruct the lens.
As the camera was solar-powered, keeping the solar panel clean was also essential. This regular maintenance was key to preventing disruptions in the camera’s performance and maintaining it as a reliable monitoring tool for the coop.
Step 7: Enjoying the Benefits
The final step was the most enjoyable. With the camera set up and functioning smoothly, I was able to reap the benefits of my efforts. I could check on my chickens anytime from my phone, offering peace of mind and a fascinating glimpse into their daily lives.
The camera served as both a security tool and a source of entertainment. I captured amusing and unique moments in the coop, which I then shared with friends and family, adding an unexpected and delightful dimension to my chicken-keeping experience.
Conclusion
Setting up a camera in my chicken coop has been a game-changer. It offers security, insight, and a bit of fun. I hope this guide helps you secure your coop and provides a window into the fascinating world of your chickens. Remember, the key is to choose the right camera and placement, and the rest will fall into place. Happy chicken watching!


